Inviting Team Members
1
Open the invite dialog
Click your workspace name in the top-left and choose Invite a member.
2
Add their details
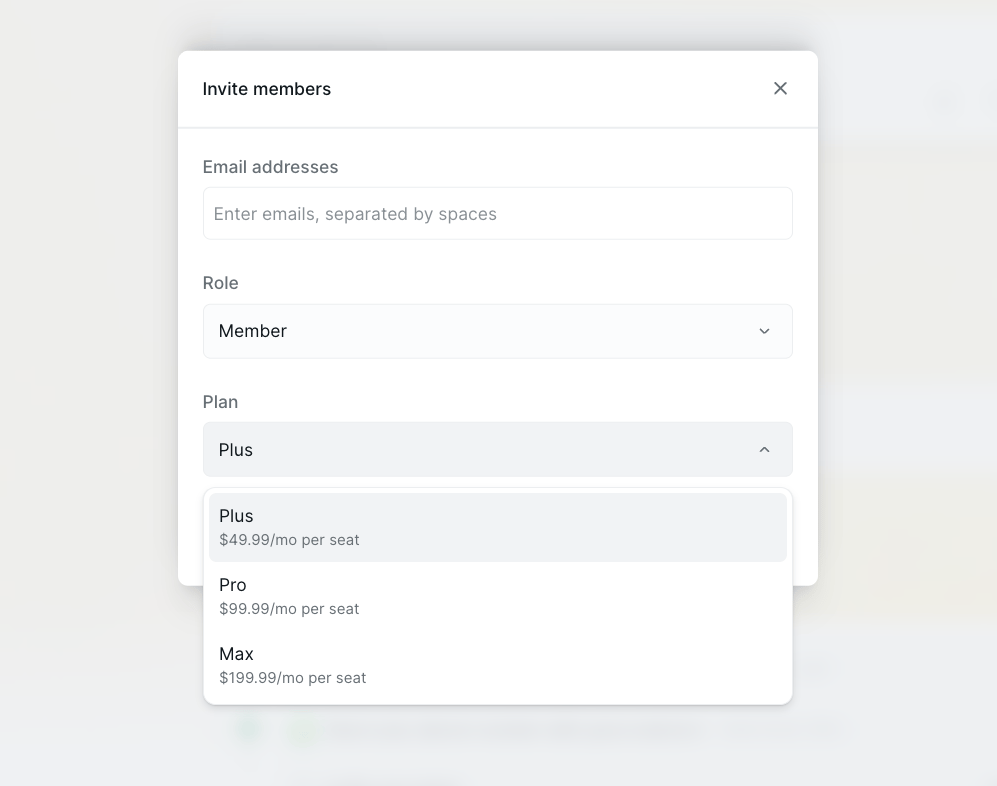
- Enter one or more email addresses (separate multiple emails with spaces)
- Pick a role: Member or Admin
- Pick a plan: Plus, Pro, or Max
3
Send the invite
Click Send invite. Their plan is added to your workspace billing, and your workspace credits increase to reflect the additional plan. Existing members and permissions stay the same.
Add Workspace Context
Workspace context lets admins share information across the entire organization. Every Lindy assistant in your workspace comes pre-equipped with that context, so your team never has to repeat the same background in their own setups. Go to Settings and choose the Settings option under Workspace.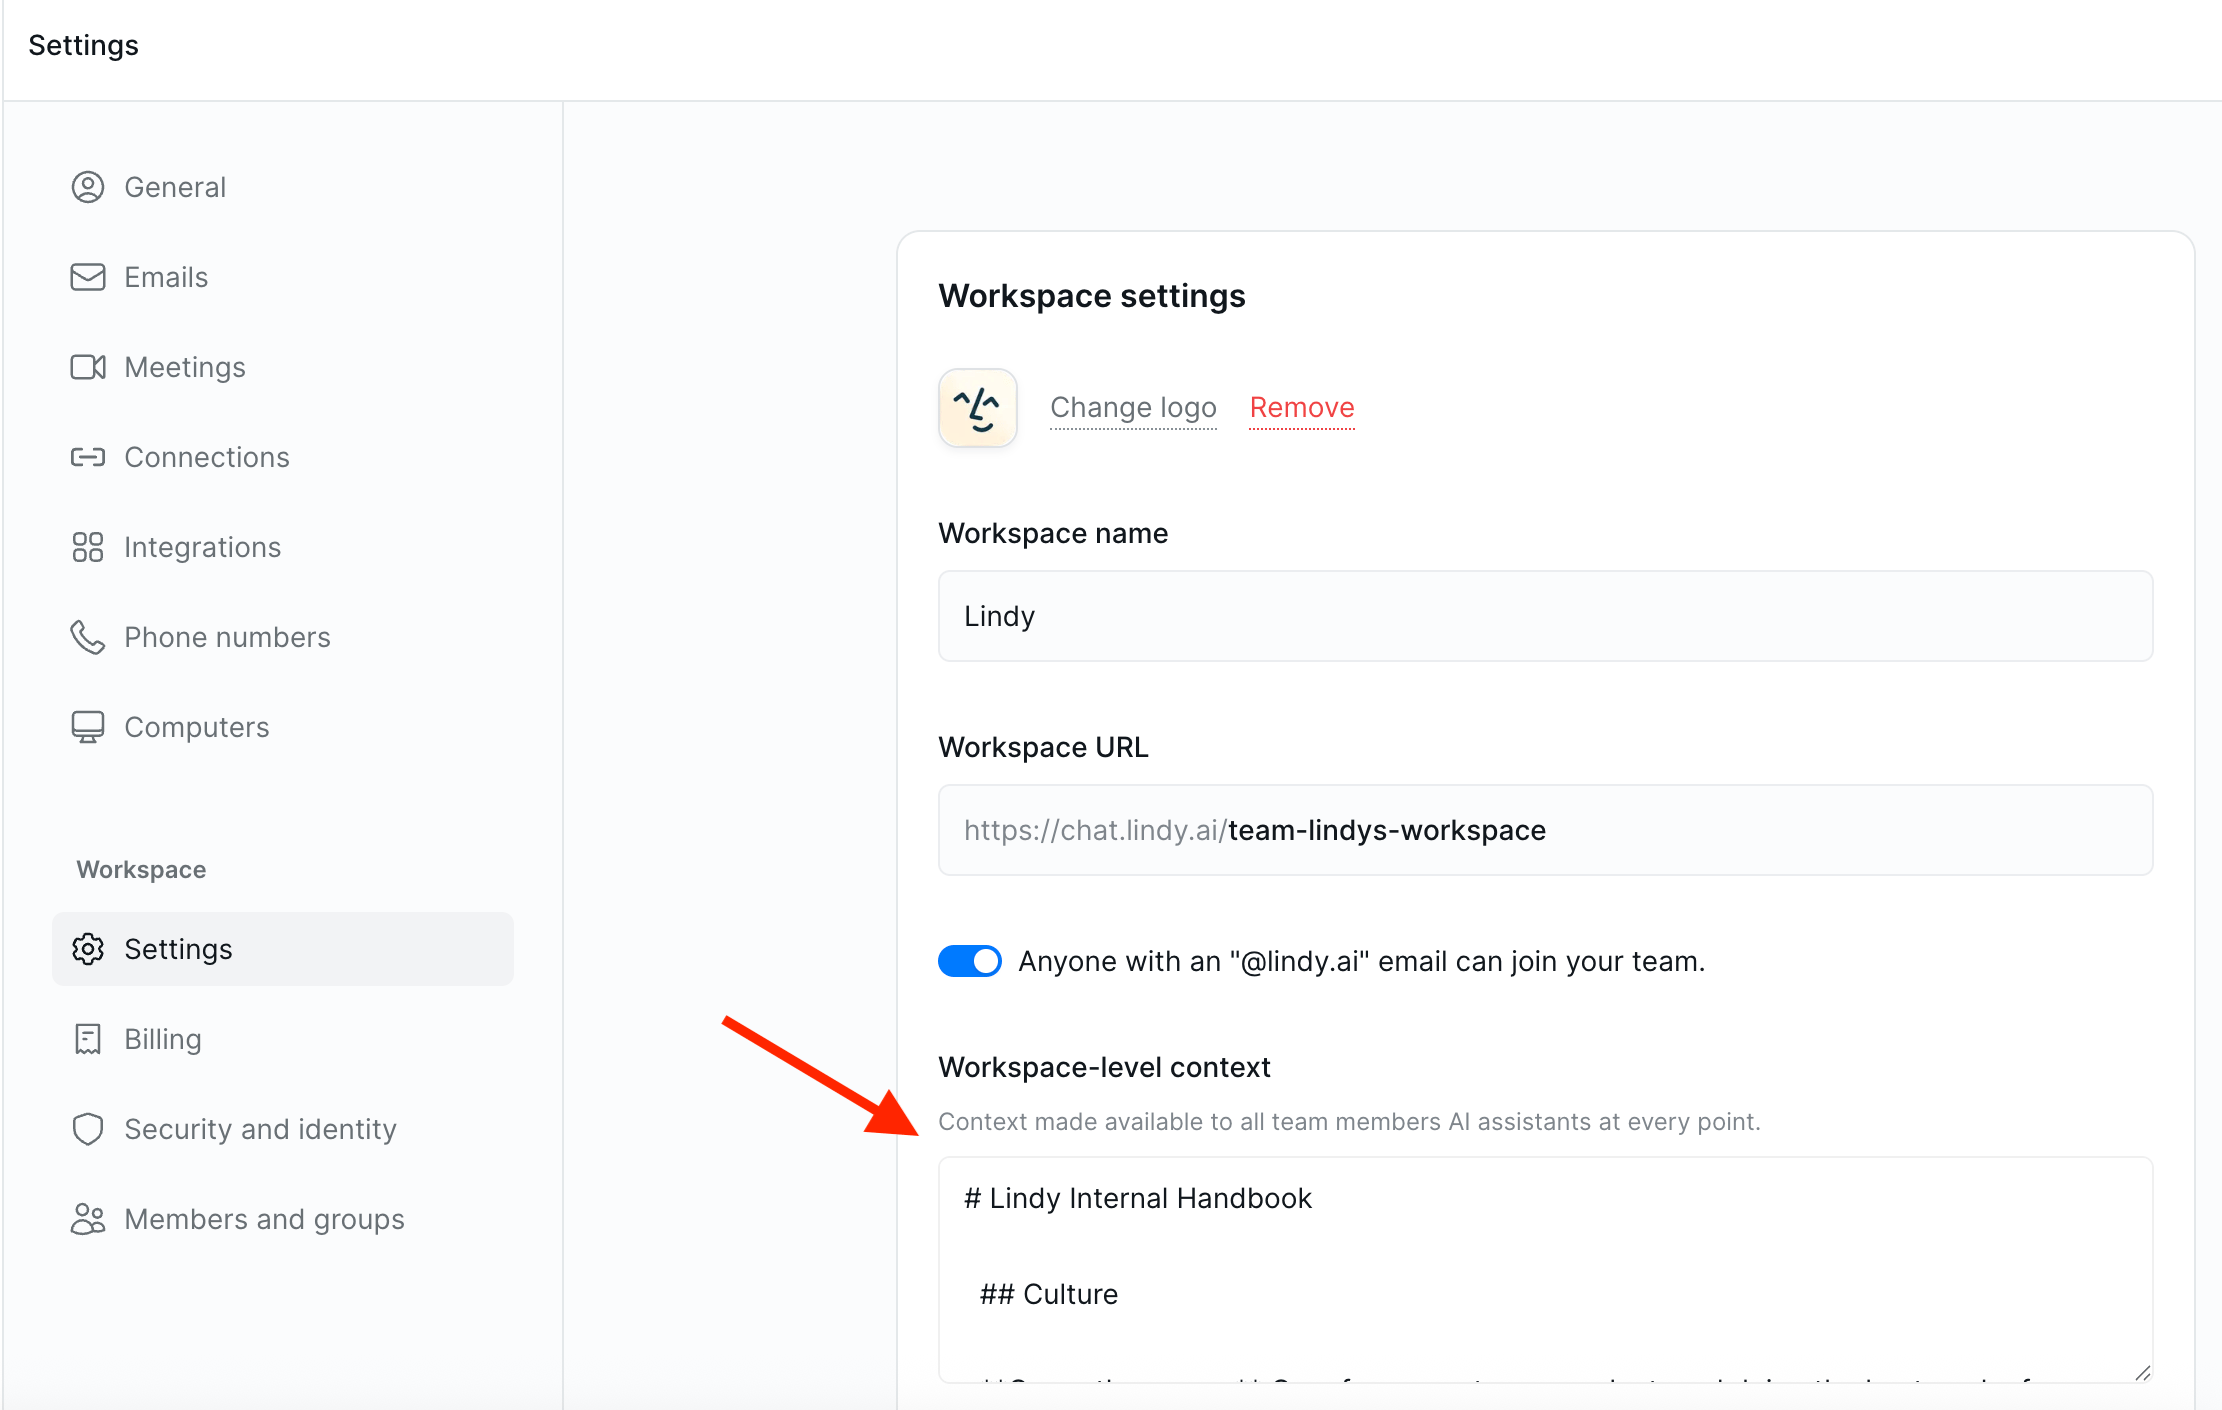
Admin Controls
Admins can control which features are available to users across the workspace. Toggle each feature on or off to manage access. Go to Settings and choose the Settings option under Workspace.Managing Members
To manage existing members, click your workspace name in the top-left → Settings → Members and Groups.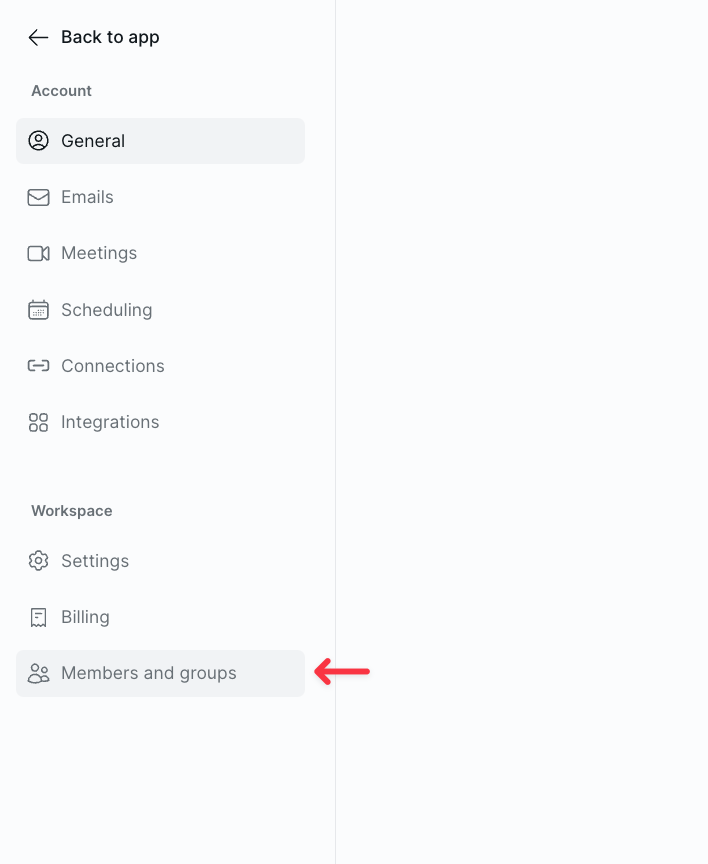
Allocating Credits
Admins and owners can set credit limits for each teammate, capping how many credits they can use each month. Click the … menu on a member’s row and choose Edit credit limit.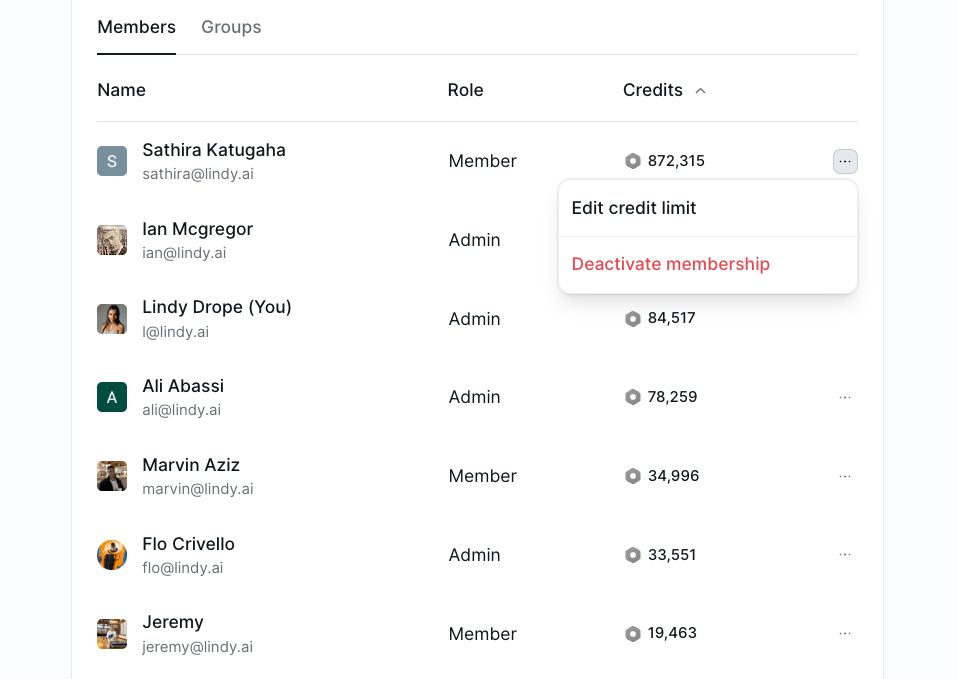
We can only stop credit usage after the limit has been exceeded, not at the exact threshold. For example, if a teammate’s limit is 100 credits and they’ve used 90, a task that costs 50 credits will still run to completion — but no further credit usage will be allowed afterward.
Transferring Workspace Ownership
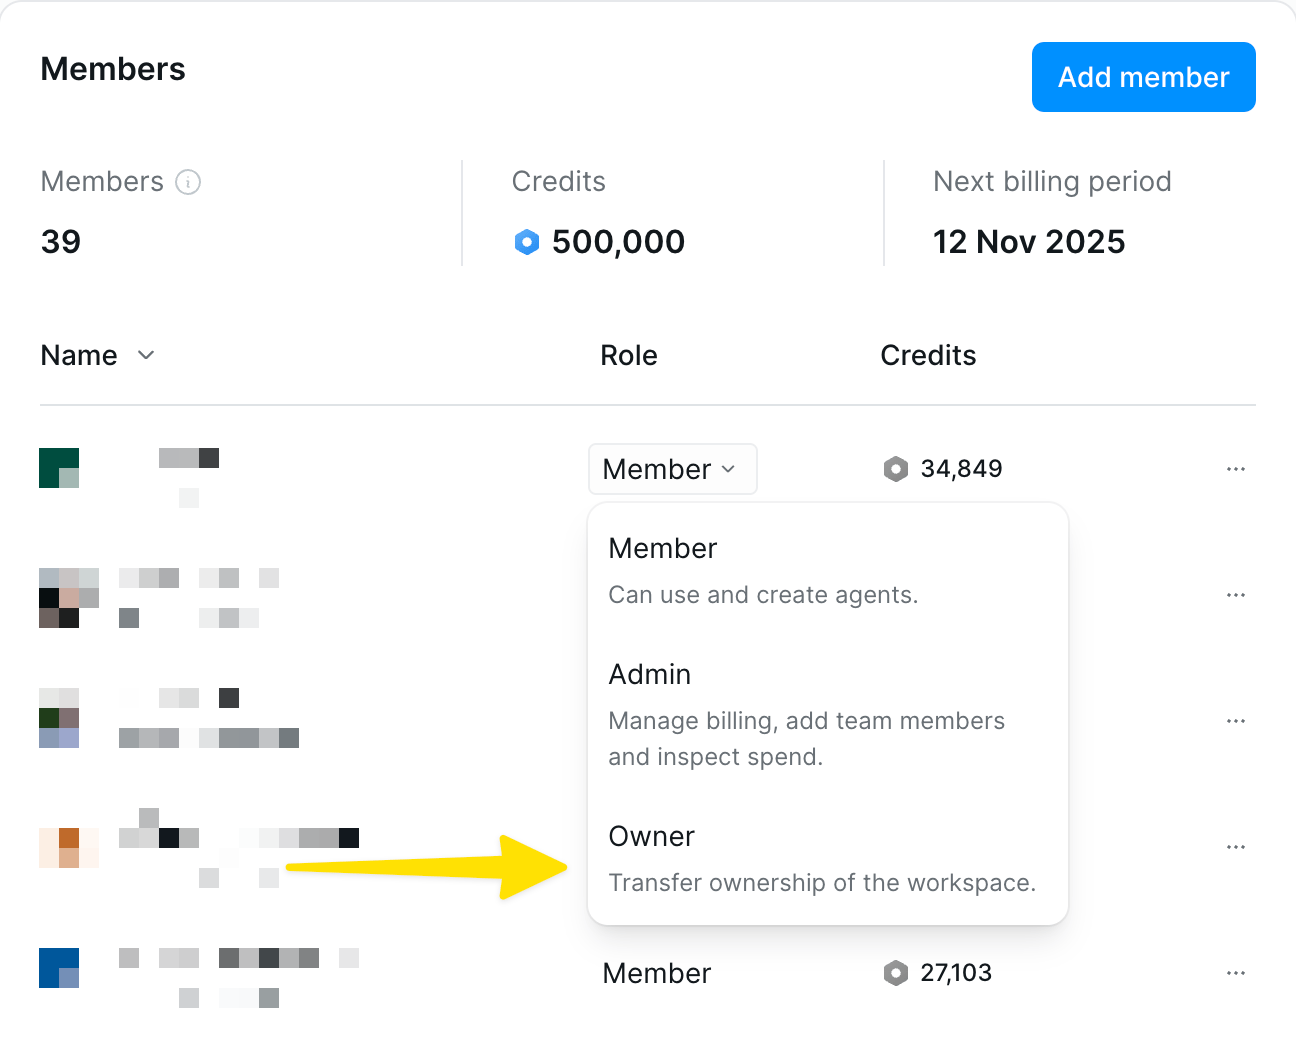
Owners are the only ones who can manage the payment method, change the workspace name and logo, and delete the workspace. Owners can transfer ownership by clicking the role dropdown next to a member’s or admin’s name and changing their role to Owner.